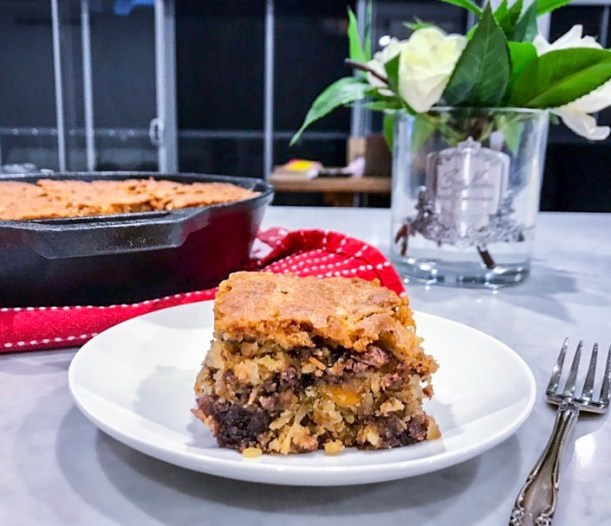
 This is what I love about cooking.
You can bring the world home.
I don’t have plans to visit New York any time soon, so to be able to open a cookbook and recreate an iconic recipe, from a chef I admire so much, is such a wonderful thing.
I have wanted to make Crack Pie for a long time now and watching Chef’s Table: Pastry gave me the push I needed.
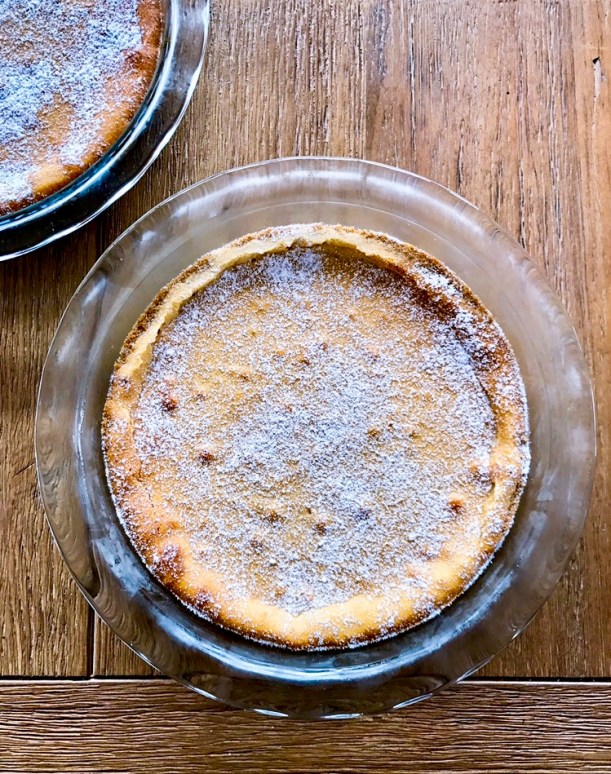
I found freeze dried sweetcorn powder online from the Melbourne Food Ingredient Depot and as soon as it arrived on my door step I was ready!
The recipe, other than sourcing that one ingredient, has a few steps. However, every step is simple and the entire thing can be made over a few days (I really liked that Tosi gave instructions on how to store each step as well).
I wasn’t sure if I would like this. When there are rave reviews and hype, I think expectations rise and then I never know if I genuinely don’t like the thing in question or if I have built it up to such huge proportions in my mind that nothing could ever live up to what it has now become! So going into this I was cautious to not get too excited.
I also wondered what on earth I was going to do with TWO pies!
The family were confused about what was in the pie. I think in their minds they were thinking apple pie has apples, meat pie has meat… crack pie has…crack???
They were not keen to try it. I had to force them. It took one bite for them to finish off the entire pie in a few hours. So now we all understand why Crack Pie is called Crack Pie 🙂
And I am glad there was a second pie in the freezer to eat at a more leisurely pace, once we calmed down from the frenzy that surrounded our first experience with this pie.

How lucky am I to be able to experience a treat from the other side of the world in my own kitchen.
Crack Pie by Christina Tosi from the Milk Momofuku Milk Bar Cookbook
This recipe makes 2 pies (which you think you don’t need but in hindsight you realise was genius!). The recipe can be found easily on the internet so I’ve added it here with slightly modified wording.
________________________________________________
1 recipe Oat Cookie (recipe follows)
15g or 1 Tablespoon tightly packed light brown sugar
1g or 1/4 teaspoon salt
55g butter, melted
1 recipe Crack Pie Filling (recipe follows)
Icing sugar for dusting
1. Heat the oven to 180C.
2. Put the oat cookie, brown sugar and salt in a food processor and pulse it on and off until the cookie is broken down into a wet sand.
3. Transfer the crumbs to a bowl, add the butter and knead the butter and ground cookie mixture until moist enough to form into a ball.
4. Divide the oat crust evenly between two 25cm pie tins. Using your fingers and palms of your hands, press the oat cookie crust firmly into each pie tin, making sure the bottom and sides of the tin are even covered. Use the pie shells immediately or wrap well in cling film and store at room temperature for up to 5 days or in the fridge for up to 2 weeks.
5. Put both pie shells on a baking tray. Divide the crack pie filling evenly between the crusts. The filling should fill them 3/4 of the way full. Bake for 15 minutes only. The pies should be golden brown on top but will still be very jiggly.
6. Open the oven door and reduce the oven temperature to 170C. Depending on your oven, it may take 5mins or longer for the oven to cool to the new temperature. Keep the pies in the oven during this process. When the oven reaches 170C close the door and bake the pies for 5 minutes longer. The pies should still be jiggly in the bull’s eye centre but not around the outer edges. If the filling is still too jiggly, leave the pies in the oven for an additional 5 minutes or so.
*In hindsight I should have left mine for another 5 minutes, I only realised this once I cut into them. As my slices sat there they slowly turned into a puddle. But who cares! The taste was still there.
7.Gently take the tray of crack ones int if the Ives and transfer to a rack to cool to room temperature. Then freeze your pies for at least 3 hours or overnight to condense the filling for a dense final product – freezing is the signature technique and result of a perfectly executed crack pie.
8. If not serving the pies right away, wrap well in cling film. In the fridge, they will keep fresh for 5 days. In the freezer they will keep for 1 month. Transfer the pies from the freezer to the refrigerator to defrost for a minimum of 1 hour before you’re ready to get in there.
9. Serve your crack pie cold!
Decorate your pies with icing sugar, either passing it through a fine sieve or dispatching pinches with your fingers.
_____________________________________________________
Oat Cookie Recipe
115g butter at room temperature
75g light brown sugar
40g granulated sugar
1 egg yolk
80g bread flour
120g porridge oats
0.5g or 1/8 teaspoon baking powder
0.25g or a pinch bicarbonate soda
2g or 1/2 teaspoon sea salt
Non stick cooking spray
1. Heat the oven to 180C.
2. Combine the butter and sugars in the bowl of a free standing electric mixer fitted with the paddle or flat beater attachment and cream together on medium high for 2 to 3 minutes, until fluffy an duple yellow in colour. Scrape down the sides of the bowl with a spatula. On low speed, add the egg yolk and increase the speed to medium high land beat for 1 to 2 minutes until the sugar granules fully dissolve and the mixture is a pale white. 3. On low speed, add the flour, oats, baking powder, bicarbonate of soda and salt. Mix for a minute until your dough comes together and any remnants of dry ingredients have been incorporated. The dough will be a slightly fluffy, fatty mixture in comparison to your average cookie dough. Scrape down the sides of the bowl.
4. Spray a 25x31cm baking tray and line with parchment or a silicone baking mat. Plop the cookie dough in the center of the tray and with a spatula, spread it out until it is 5mm thick. The dough won’t cover the entire tray and this is OK.
5. Bake for 15 minutes or until it resembles an oatmeal cookie – caramelised on top and puffed slightly but set firmly. Cool completely before using. Wrapped well in cling film, the oat cookie will keep fresh in the fridge for up to 1 week.
________________________________________________
Crack Pie Filling
* Tosi states for this recipe you must use a free standing electric mixer with a paddle or flat beater attachment. Also the mixer is to be kept on low speed through the entire mixing process. If you mix at a higher speed you will incorporate too much air and your pie will not be dense and gooey – which is the essence of crack pie.
300g granulated sugar
180g light brown sugar
20g milk powder
24g freeze dried sweetcorn powder
6g or 1 1/2 teaspoons sea salt
225g butter, melted
160g or 180ml whipping or double cream
2g or 1/2 teaspoon vanilla extract
8 egg yolks
1. Combine the sugar, brown sugar, milk powder, sweetcorn powder and salt in the bowl of a free standing electric mixture fitted with the paddle or flat beater attachment and mix on low speed until evenly blended.
2. Add the melted butter and paddle for 2 to 3 minutes until all the dry ingredients are moist.
3. Add the cream and vanilla and continue mixing on low for 2 to 3 minutes until any white streaks from the cream have completely disappeared into the mixture. Scrape down the sides of the bowl with a spatula.
4. Add the egg yolks, paddling them into the mixture just to combine. Be careful not to aerate the mixture, but be certain the mixture is glossy and homogenous. Mix on low speed until it is.
5. Use the filling right away or store it in an airtight container in the fridge for up to 1 week.


 This week’s
 This week’s recipe for the
 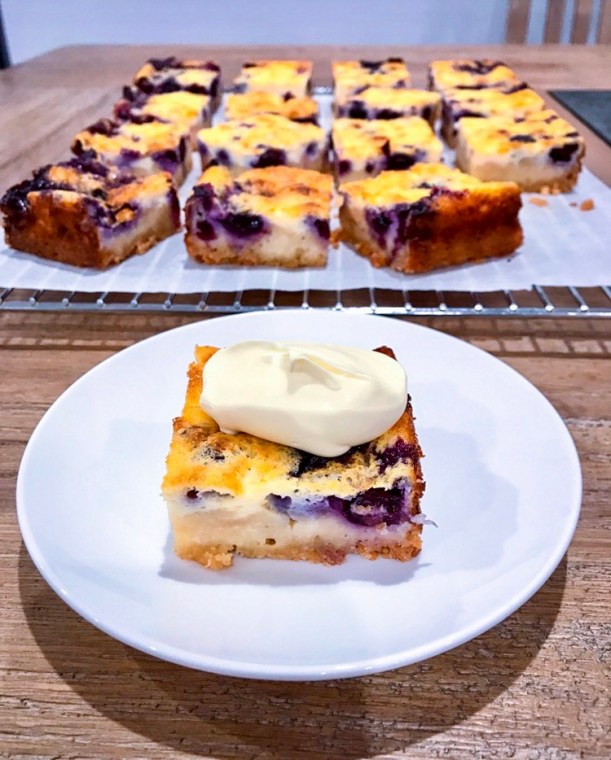 The recipe was really simple. A cornmeal biscuit crust that is baked golden, then topped with fresh blueberries and a vanilla flavoured buttermilk custard.

 This week we are cooking Baba Ganoush with